Bell Capsicum/chilli - the outside edge is not as hot as the inside.
Beans
Madagascar Beans - Take bean seeds out and used in curry and salad. Eat them before they dry. Use like Lima Beans. They form a rampant vine.
Winged Beans - soak in boiling water for 2 hours, then plant. Vines will come up in the 2nd year. They have a pretty mauve flower.
Snake Beans - Pick and eat when young.
New Guinea Beans - (Italian Edible Gourd,Serpent Gourd, Cucuzzi, Indian Squash) Not actually a bean - Gourd family - can get to a metre long! Eat at about a foot long. Treat and eat like a Zucchini.
Bamboo Shoots - harvest at about a foot long - peel, chop and cook in salted water at least 20mins.
Choko - harvest small.
Monday, 12 March 2012
Sunday, 11 March 2012
Identifying and Using Tropical Vegies No.1 'c'
Kale - (can be classified by leaf type: Curly (Scots), Plain, Rape, Leaf and Spear and Black cabbage or Dinosaur)
Lovely steamed. Will grow through to the following season if you can stand how bad they look!
Pumpkin Vine tips - chopped and steamed, in stir fries.
Choko - same as pumpkin vine tips.
Sweet Potato Vine - same as both of the above.
Root Veggies
Arrowroot - Cut a piece of new growing end off. Cut the scraggly root bits off. Peel, chop into chunks and put in curry, or bake, or chip. Can eat curled up inside leaf; take out spine and treat like cabbage. Can make Arrowroot powder. Don't confuse with the 'scrappy' type (no red and small tubers).
Cassava - grows from woody stem. Massive tubers - get the side ones without pulling the whole plant out.
Taro and Cocoyam - Leaves are high in Oxalates. Grow big leaves. Do not confuse with Tahitian spinach which have dimply leaves which join the stem part way down. Cocoyam joins at the bottom, Taro joins 1/2 way down and has red stems.
Yam - Purple - can be used as potato in potato salad. Easy to grow, rampant vines can grow up trees.
Sweet Potato - great in potato salad with yams. Come in many types, can be grown in large pots, keep well watered. For favourite types, cut top off, put in saucer until it sprouts, then plant out.
Water Chestnuts - grow in old baths, sinks or polystyrene boxes. In a bath put or 3 at most. 1 in a sink or box. Don't put too many - or they will be restricted as they grow bigger. They need full sun. Put in a good 6 inches of soil or compost and keep water over soil. You can put cow or horse manure in at the start. They are cooked lightly - can be thrown in a stir fry near the end.
Thursday, 23 February 2012
Identifying and Using Tropical Vegies No.1 'b'
Some of the info I have copied from a hand-out we received on the day...
Edible Flowers - Nasturtium, Pineapple Sage flowers and leaves, Society Garlic flower, Garlic Chives flower...
Brazillian Spinach - (Sissoo Spinach, Sambu Lettuce) Alternanthera Triandra sp.
Origin: Highlands, wet, cool South America
Plant: Sept - March
Harvest: Sept - June
Related to Hibiscus. Mucilaginous.
Kan Kong - eat end bits - hollow stems. Good greens for summer. Likes damp spots. Can be eaten raw. Grown from chopped up sections.
Ceylon Spinach - lovely raw. Mucilaginous. Trailer or loose limber. Red stem or green stem varieties. Seed of red stem can be used as food colouring.
Tahitian Spinach (Taro family) Xanthosoma Brasillience - grown as a green.
Origin: hot, humid tropics
Plant: Sept-Feb
Harvest: Nov-May
The tahitian spinach leaf is better than taro and cocoyam as a 'tropical green' as it has the least amount of irritating crystals and does not need a long cooking time - ten minutes is adequate. Serving the leaves with coconut milk or cream will help the body to use the Vitamin A, which is a fat-soluble vitamin. Harvest the young leaves and cook in stews, casseroles and leaf wraps. This plant does not have an edible corm.
Lebanese Cress - likes damp and shade. Ground cover, slightly peppery.
Salad Mallow (Corchorus olitorius) (Mulaheyah, Egyptian Spinach, Jews Mallow)
Put the little seed pods in salads.
Tuesday, 21 February 2012
Workshops at Yandina Community Gardens - No.1
Our first workshop was on the 21st of January - 'Identifying and Using Tropical Vegetables' with Robyn Ford and Linda Mahony.
This is what the flyer read:
If you have ever wondered just what to do with all the unusual 'permie' plants that you now seem be growing in your vegie gardens - apart from using them as mulch that is - then come along to this workshop where Robyn will take you through a variety of these plants from identification to growing requirements. There will be samples of some yummy food made with these plants available for you to taste.
We left home around 7:15am, stopped for a wee break at the big servo on the way, then arrived just as it began at 9:30am. The room in the community centre, which was once a small suburban house, had been opened up from two smaller rooms, but it was standing room only by the time we got there! The organisers were amazed - last year they had averaged 30 people at their workshops - we signed in as numbers 72 and 73!
I'll now relay what I wrote as we stood there and listened...
(http://en.wikipedia.org/wiki/Turmeric for pics and more info...)
Tumeric - dies down in winter - best time to harvest. Easy to make into powder - chop in processor, dry it in dehydrator, then grind up with mortar and pestle.
(http://en.wikipedia.org/wiki/Ginger for pics and more info)
Ginger - same as Tumeric.

 (Taken at Crystal Waters, Maleny, Qld)
(http://en.wikipedia.org/wiki/Lemon_Myrtle for more info)
Lemon Myrtle (Backhousia citriodora, a native tree) aka lemon myrtle, lemon scented myrtle, lemon scented ironwood great leaves, has medicinal uses, and is fabulous in tea.
(http://en.wikipedia.org/wiki/Coriander for pics and more info)
Coriander - the Mexican and Sawtooth varieties are perennial; not as tender or pretty as the best known sort, but have the same flavour. (I bought a small pot plant of the Sawtooth back and planted it at the Kitchen garden.)
This is what the flyer read:
If you have ever wondered just what to do with all the unusual 'permie' plants that you now seem be growing in your vegie gardens - apart from using them as mulch that is - then come along to this workshop where Robyn will take you through a variety of these plants from identification to growing requirements. There will be samples of some yummy food made with these plants available for you to taste.
We left home around 7:15am, stopped for a wee break at the big servo on the way, then arrived just as it began at 9:30am. The room in the community centre, which was once a small suburban house, had been opened up from two smaller rooms, but it was standing room only by the time we got there! The organisers were amazed - last year they had averaged 30 people at their workshops - we signed in as numbers 72 and 73!
I'll now relay what I wrote as we stood there and listened...
(http://en.wikipedia.org/wiki/Turmeric for pics and more info...)
Tumeric - dies down in winter - best time to harvest. Easy to make into powder - chop in processor, dry it in dehydrator, then grind up with mortar and pestle.
(http://en.wikipedia.org/wiki/Ginger for pics and more info)
Ginger - same as Tumeric.


(http://en.wikipedia.org/wiki/Lemon_Myrtle for more info)
Lemon Myrtle (Backhousia citriodora, a native tree) aka lemon myrtle, lemon scented myrtle, lemon scented ironwood great leaves, has medicinal uses, and is fabulous in tea.
(http://en.wikipedia.org/wiki/Coriander for pics and more info)
Coriander - the Mexican and Sawtooth varieties are perennial; not as tender or pretty as the best known sort, but have the same flavour. (I bought a small pot plant of the Sawtooth back and planted it at the Kitchen garden.)
Saturday, 24 December 2011
Introduction to Permaculture Part 12
After another glorious morning tea, we headed up to the food forest again, with Evan. There we planted Garlic and Tumeric, as well as Pineapple Sage and Comfrey around the bottom edge of the trees we had planted yesterday.
 Evan showing us Garlic and Tumeric.

 Planting Pineapple Sage. (It has the most beautiful scent!)
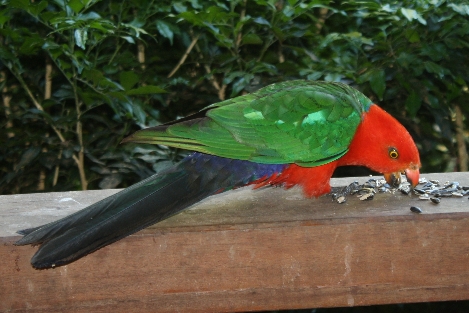
By this stage the heat was starting to get to me and a couple of the others, so we headed down into the shade of the porch and helped Morag with setting out lunch. The rest came down 15 minutes later and we all had lunch. This time we had some visiting wildlife!

Morag and Evan took pity on us and after lunch we did some propagation and potting on the table under the porch. It was much cooler there, especially with the breeze coming up from the dam.
Morag showed us how to propagate a few plants, from hard and soft stem cuttings, and by planting. A number of plants were potted up for us to take home, and Morag took those interested, out for a ramble around the garden to get getting of much admired plants! We were also given a selection of seeds to take home if we wished. I took some for the community garden.
I took home a potted Arrowroot plant and some Lemongrass, as well as a potted cutting of Lavender and a cutting of Pineapple Sage. So far (3 weeks later) everything is growing, although I haven't yet planted out the lavender, and the sage is in a glass of water, and still growing! I'm waiting for roots...
 Plant propagation through hard and soft cuttings, and planting. Also seed dissemination!
 Our weekend course was over soon after that. We walked back to the bunkhouse, packed up, and on the way out stopped to see the bamboo grove (pictured earlier). Then we took the long trek home, although we were running a few hours early due to the early start that morning.
I found it a great weekend - I picked up a few things I didn't know, and had many more things confirmed. I also got to meet a great bunch of people, and loved having Steve there to share it with me. I hope we can both get back up there to do our Permaculture Design Certificates in 2012.
Adie,
Dec 2011.


Ginger growing in the food forest.

By this stage the heat was starting to get to me and a couple of the others, so we headed down into the shade of the porch and helped Morag with setting out lunch. The rest came down 15 minutes later and we all had lunch. This time we had some visiting wildlife!
Morag and Evan took pity on us and after lunch we did some propagation and potting on the table under the porch. It was much cooler there, especially with the breeze coming up from the dam.
Morag showed us how to propagate a few plants, from hard and soft stem cuttings, and by planting. A number of plants were potted up for us to take home, and Morag took those interested, out for a ramble around the garden to get getting of much admired plants! We were also given a selection of seeds to take home if we wished. I took some for the community garden.
I took home a potted Arrowroot plant and some Lemongrass, as well as a potted cutting of Lavender and a cutting of Pineapple Sage. So far (3 weeks later) everything is growing, although I haven't yet planted out the lavender, and the sage is in a glass of water, and still growing! I'm waiting for roots...


I found it a great weekend - I picked up a few things I didn't know, and had many more things confirmed. I also got to meet a great bunch of people, and loved having Steve there to share it with me. I hope we can both get back up there to do our Permaculture Design Certificates in 2012.
Adie,
Dec 2011.
Introduction to Permaculture Part 11
ItP Garden in Stages...
1.How it looked before we began.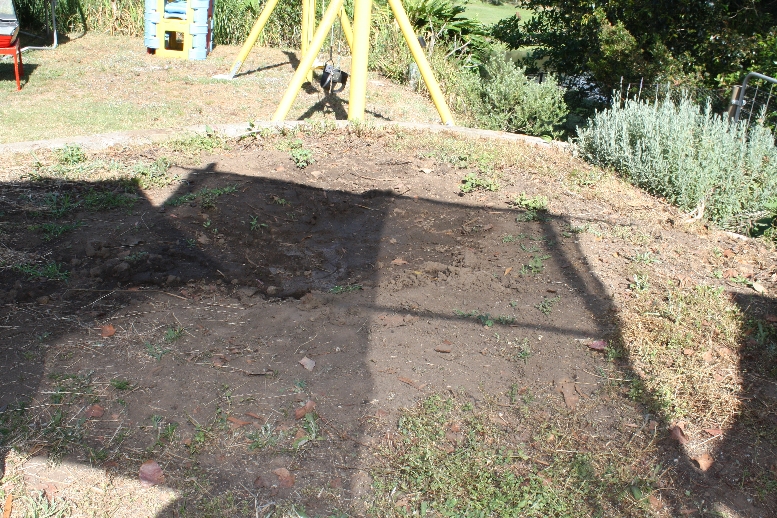


7. The kids helping Morag plant out. They were our 'newspaper soakers' also!

Thursday, 22 December 2011
Introduction to Permaculture Part 10


Morag told us that beneficial insects prefer the yellow and red flowers.

Morag with the worm tower. It's about 3 times as long as the ones we made for the Community and home gardens!
Subscribe to:
Posts (Atom)